Showing posts with label Yeast. Show all posts

Nov 25, 2013

Spiced Eggless Pumpkin Quick Bread

Pumpkin bread is the kind of food that you want to take with you when your mind wanders into nostalgia. It evokes a lot of emotions, most of all happiness. Done with the right spices, this wonder food, which is a big source of Vitamin A, can be relished as a snack any time of the day.
With my resolve to post a pumpkin recipe everyday of this week leading to Thanksgiving day, I made a list of all the dishes I wanted to prepare and this bread topped the list. It is an extremely simple quick bread which means there is no wait time required between making the batter and baking.


The pumpkin bread is symbolic of warmth. The recipe below does not make an overtly sweet bread. Its a sure-fire crowd pleaser and I am very happy to report that the two food critics in my house absolutely loved it! I recommend it as a kid friendly recipe and it can easily make its way into the school snack box.

Spiced Eggless Pumpkin Quick Bread 

Recipe adapted from Gayathri's cookspot
Servings: 1 9-inch loaf
Prep Time: 10 mins Cook Time: 60 mins

Ingredients 

1 cup All purpose Flour
3/4 cup Whole Wheat Pastry flour
1 cup granulated Sugar
3/4 tsp Baking Soda
1/4 tsp Double acting Baking powder
1/2 tsp Salt
1/2 tsp Nutmeg
1/2 tsp Cinnamon
2-3 Cloves (If using powder then 1/2 tsp)
1 cup Pumpkin Puree
1/2 cup Oil
3 tbsp Honey
3 tbsp Water
Chopped walnuts (handful to 1/2 cup)

Instructions

  1. Preheat oven to 350 deg F. Line a 9 inch loaf tin with parchment paper or grease with oil.
  2. Sift together all purpose flour, whole wheat pastry flour. sugar, salt, nutmeg, cinnamon, cloves together in a bowl.
  3. In another bowl mix together pumpkin puree, oil, water, honey
  4. Add the wet ingredients into the dry ingredients to form a thick batter. Mix only till well combined, do not overmix.
  5. Fold in the walnuts
  6. Fill the loaf tin with the thick batter and lightly spread to be even topped
  7. Bake at 350 deg F for 60 minutes till a skewer inserted comes out clean with no batter sticking to it. Check from 55 mins to see if it is done
  8.  Remove from oven and cool in the loaf tin for 5 minutes. Continue to cool on a wire rack.

May 20, 2013

Eggless Doughnuts dipped in Cinnamon Sugar or Chocolate glaze


Doughnuts are my father-in-law's absolute favourite junk food of the West. When we came to the US a few years back on a holiday, he used to steer his gang of friends many times towards the Dunkin Donuts close to our apartment and enjoy the donuts there. My mother-in-law always refused even a single bite for the reason that she doesn't enjoy eating sweets. In hindsight I am glad that she did not eat them. What we did not know back then was they contain eggs which is a strict no for her.


Cinnamon sugar dipped doughnuts were what we ate at the fall festival last year with my parents and they are what saved the day at the Fisherman's Wharf during our visit to SFO a month back. V was starving and I was all out of snacks and we did not find anything there that looked "less fishy". We bought a bag of fresh mini doughnuts and the darling wolfed it down as if they were her favourite savoury snack.
With all the memories gushing, I decide to try my hand at making them at home and without eggs. They turned out amazingly tasty. Making it at home also meant that I could control the amount of sugar that goes into it. This confectionery is deep fried and packs some sugar so even though it is easy to make, it may not be something to eat while on a diet. But for those cravings, give it a try!


Eggless Donuts dipped in Cinnamon Sugar or Chocolate glaze

Servings: 10 regular sized donuts (I made 6 regular donuts and 6 doughnut holes)
Prep Time: 2 hrs (including 1.5 hrs rise time) Cook Time: 20 mins

Ingredients

1 1/4 cups of All Purpose Flour
3 tbsp Fine powdered sugar
1/4 cup Milk
1 tbsp Butter
Pinch of salt
1 1/2 tsp yeast
1/4 cup water
1/2 tsp Vanilla essence

For the Cinnamon Sugar topping

2 tbsp of Fine powdered sugar
1/2 tsp Cinnamon powder

For the Chocolate Glaze

4 tbsp Fine powdered Sugar
2 tbsp Cocoa powder
2 1/2 tsp Milk
1/4 tsp Vanilla essence

Instructions

  1. Proof* the yeast in a container. (Heat the water till warm, 20 secs in microwave, to it add a tsp of sugar and the yeast. Stir well and let it sit for 10 mins till it froths up)
  2. Mix the flour, sugar, salt in another container.
  3. To that add milk, melted (room temperature) butter and the yeast mix and mix well
  4. Knead with hand till dough consistency. At this point if it is too sticky use a couple of tbsp of flour but putting in a little at a time.
  5. Place the dough in a container, cover it with a cling wrap and let it rest in a wam place (above the fridge) for an hour.  Allow it to double in size.
  6. Now knead the dough softly on a lightly floured surface and flatten it with hands to form a disc of 1/4 inch thickness
  7. Use a cutter to cut out the round shape of a doughnut. I used a steel cup which was 2.5 inches wide.
  8. Use a bottle cap to cut out and remove the center forming a hole.
  9. Place the ring doughnut onto a lightly floured plate/tray.
  10. Continue with the rest of the dough till complete.
  11. To make doughnut holes - simply pull off a small amount of dough and shape delicately into a ball. Place on floured tray.
  12. Cover the tray with cling wrap and let it rest in a warm place.
  13. In the meantime, heat the oil till it is hot enough to fry.
  14. Also prepare the dips as outlined below.
  15. Fry the doughnuts till golden brown. Remove from oil after excess oil drips off.
  16. Place on a try lined with paper tissue to soak in excess oil.
  17. Doughnuts are best eaten warm. Serve them with coffee or hot chocolate to make it a delicious snack.

For Cinnamon Sugar Dip


  1. Mix the sugar and cinammon powder in a vessel.
  2. Roll the doughnut in the mixture till it is nicely coated with the mixture
  3. Remove and place on a wire rack to set

For Chocolate Glaze


  1. Mix the milk, sugar, cocoa powder and vanilla essence and stir till there are no lumps.
  2. Place the doughnut in the mixture, flat side down and get the glaze on one side.
  3. Remove and place on a wire rack to set with the non glaze side down. (Place some paper under the wire rack to soak up any drippings to help ease cleanup)
*I have been using Red Star Active Dry Yeast and it proofs up like a dream.

Mar 20, 2013

Whole Wheat Calzone

Calzone is a God-sent for fussy eaters. It is basically a turnover or a folded Pizza and is extremely popular in my house because of the easy eating. Unlike a pizza there is not much fear of the topping falling off the base and then having to eat the whole thing like bread with a side dish. It's compact shapeis great for being grabbed in one toddler hand while jumping to in front of the TV to the tune of M-I-C-K-E-Y  M-O-U-S-E.
Use whole grains in the dough, get really creative with the veggies and bake to make it a healthy brunch/snack/dinner and enables the delivery of a lot of nutrition. Make it bite-sized and it can become an entree to a big meal. I am sure it would provide a surprise element to the lunch box.

The calzone also reminds me of the Kadabu that we make during Ganesha festival and is tradionally covered with a rice flour sleeve. And somewhere that connection works very well on our apetite to devour this tasty sandwich. The fact that I dont have to remind my daughter to eat at every bite, makes this my most favoured recipe. It is easy enough to make but I am yet to learn about dough storage.


I made it on a busy day and I had a couple of things already going in the kitchen. Not much effort and I like the fact that I dont have to pre-cook anything!

Whole Wheat Calzone

Servings: 10 Calzones     
Prep Time: 3 hrs (including rise time)    Cook Time: 20 minutes

Ingredients

1/2 Medium Onion (I used sweet onion)
16 Cherry tomatoes (or 1 regular tomato)
1/2 Capsicum
1 Jalapeno
1/2 cup Corn (I used frozen)
1 cup Tomato sauce (preparation instructions in this post)
Salt
Black Pepper powdered
Spice Mix of choice
Mozzarella Cheese - as much or as little as desired

Instructions


  1. Prepare the pizza dough as per instructions here.
  2. To make the suffing, mix all the vegetables, salt, pepper and any other spice of your choice in a bowl. Keep aside. 
  3. Once the dough has risen, pull out a good sized ball of dough and roll it out on a floured surface with a rolling pin
  4. Brush the dough circle with tomato sauce.
  5. Pile on a proportionate quantity of stuffing onto the rolled out dough making sure that it lies on the bottom half of the dough. Leave some space around the edges.
  6. Optionally, pile on mozzarella cheese on top of the veggies.
  7. Fold the top half over the bottom half and seal the edges by pressing the edges together all along the semi-circle.
  8. Make indentations along the edges with a fork.
  9. Keep the stuffed dough in a baking tray, covered with a towel or cling wrap, and allow to rise in a warm place for around 30 minutes.
  10. While the stuffed dough is rising preheat the oven to 350
  11. Bake at 350 for 10 minutes and turn it over and bake for another 5 minutes to get them evenly browned on both sides.
  12. Serve calzones warm, especially important if kids are going to munch on them.
Sending this to Healthy Foods for Healthy Kids – Italian Dishes and Nithu’s page


Mar 16, 2013

Basic White Dinner Rolls


Since the time I discovered that I too can conquer yeast, I have this feeling of having reached square 1 of infinity. The possibilities are endless. I am constantly thinking about what to bake with it. Some might call it obsessive but it is a great stress buster especially to get my mind away from the everyday happenings around me. Baking bread does to me what attempts at meditation do not. Complete focus and attention are naturally there.
The past weekend was an over zealous baking marathon. It was also extremely therapeutic in a way that I ended up totally satisfied with all that I was able to do. I had two things to bake. The first one, dinner rolls, was for sheer repeatability. I wanted to be sure that the first time I got it right was not by fluke and I could replicate the feat with ease everytime. The second one on my list was a Sweet Chariot-ish Pineapple cake complete with the frosting. It will suffice to say that I had my share of success and failure (respectively) but the sheer pleasure and relaxation that the process provided, left me with a whole lot of good cheer.
Baking bread has helped me fight the cakes and cookies fatigue. It has gotten me over the anguish of baking something sweet which the family wont eat.


Baking breads or buns is time consuming.... for the dough. There is very little one has to do in the four odd hours that it takes to make apart from wait for it to rise. So one has enough time to conjure up the accompaniment. In my case I decided to turn the rolls into the pav of pav-bhaji. Given the quantity of the dough I got after the rise, I decided to try my hand at shaping pretty rolls as well. I got a braided one, a knotted one and also a rolled one. I dint really look at any making videos or techniques to make the different shapes. I used some photos online as my inpiration.


Basic White Dinner Rolls

Servings: 15 regular medium sized rolls
Prep Time: 4 hrs (including rise time)      Cook Time: 25 mins

Ingredients

3.5 cups all purpose flour
2-1/4 tsp Active Dry Yeast
1/4 cup lukewarm Water (Microwave for 20 secs)
1-1/4 cups milk
3 tbsp Butter
2 tbsp Sugar
3/4 tsp Salt

Instructions

  1. Stir in the yeast and sugar in lukewarm water and let it rest for around 10 mins. If the mixture does not froth up discard the liquid and start over again.
  2. Soften the butter completely by leaving it out on the counter for sometime. Or Microwave it for 20 seconds to get it soft.
  3. Mix the butter and milk into a smooth mixture.
  4. Add the yeast mixture to the milk mixture
  5. Add salt to the liquid and mix well.
  6. Now add the flour one cup at a time into the liquid and mix well.
  7. By the time you add the 3rd cup, the mixture starts to form into a dough.
  8. Start kneading the dough by hand (It is going to be very sticky at this point)
  9. Add small amounts of flour and keep kneading till the dough starts to unstick from hands and forms into a smooth ball.
  10. Continue to knead for another 10 minutes or so.
  11. Grease a bowl (double the size of your dough ball) and place the dough ball in it and roll it around so its covered all around with the grease. Cover with a plastic cling wrap. (I think you can use a clean cloth as well as long as the bowl is well covered.)
  12. Also I rubbed the paper, the butter was wrapped in, all over the bowl to grease it. A few drops of oil could also be used.
  13. Place the bowl in a wam place and let it sit for 2 hours to enable the dough to rise. Top of the fridge works best for this.
  14. After 2 hours, the dough would have risen to twice the size.
  15. Softly knead down on it with knuckles and then shape it in whichever way you like (See instructions for Shaping the Roll below)
  16. Place the rolls in the tray that would use to bake ensuring there is atleast 1.5 inches of space around each roll.
  17. Cover the tray with plastic cling wrap and keep the tray in a warm place to rise for 1 hour. Again top of fridge.
  18. Preheat the oven to 350°F in the last 15 minutes of the second rise.
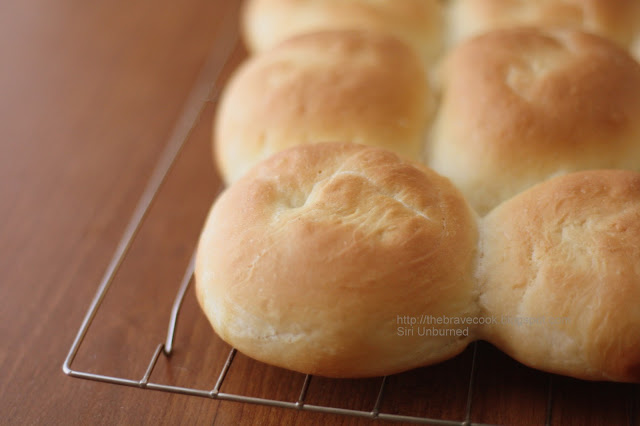
  19. After 1 hour, the rolls would have risen very nicely and would have stuck to each other. Looks like one big pull apart roll.
  20. Bake in the preheated oven at 350°F for 20-25 minutes till the top is a nice golden brown. Mine were done in around 23 minutes.
  21. Serve warm or slice it and warm it up on a skillet before serving

Shaping the rolls

1) Regular roll


  • Flatten the dough to a 1 inch thick square. Using a rolling pin is easier for this. If the dough tends to spring back, leave it for a couple of mins before rolling again.
  • Cut the square into equal sized squares using a knife on the vertical and horizontal axes.
  • Using your palms, shape each small square (2 inches) into a ball
  • Place it in the baking tray.
2) Braided roll


  • Pinch off 3 table tennis ball size ball from the dough.
  • Roll each ball between palms to elongate the ball into a 4 inch long rope (1/2 inch diameter)
  • Place all the 3 ropes beside each other and braid them like you would hair.
  • Pinch the top edges of the ropes together and the bottom edges together
  • Place it in the baking tray
3) Knotted roll


  • Pinch off a ball the size of a golf ball, from the dough.
  • Roll the ball between palms to elongate the ball into a 6 inch long rope (1/2 inch diameter)
  • Make a simple knot with the long roll
  • Loop the end of the rope coming from below, stick it on top of the knot.
  • Loop the end of the rope coming out from the top and stick it below the knot.
  • Place it in the baking tray
4) Rolled


  • Flatten the dough to a 1/2 inch thick rectangle
  • Cut a rectangle around 4 inches * 2 inches from this
  • Starting from a smaller side roll lightly till the end of the length.
  • Place it in the baking tray

Mar 4, 2013

Whole wheat Veggie Pizza with 7 spice base


To make the perfect pizza has been one of my life quests ever since we landed in the USA and I had on hand a great big oven. There have been quite a few experiments and not all of them have turned out palatable. There have been thick crust pizzas with crusts so thick that we got exhausted chewing on them. There have been thin crust pizzas which have been so thin that we were hungry even after consuming 2 10-inchers. There have been pizzas where the topping just dropped off and we ended up eating the whole thing like chapathi and curry. There have been cheese-less pizzas for the days when I felt extra conscious of the dent I was making in Mother Earth. There have been sauce-less pizzas for those lazy experiments. There have been over garlicky pizzas and there have been bland ones too. The highlight and turning point arrived when one weekend T was craving Rosatt's pizza and I offered to make it at home instead. Immediately an aghast kiddo looked straight into my eye and explained "But amma, appa meant he wants to eat yummy pizza".
Now I am not complaining about the duo who are the guinea pigs in all my experiments. They are real sweet and supportive but I guess there is only that much they can take when it comes to a mood uplifting food like pizza. 
I am now happy to announce that I seem to have stumbled upon the best recipe for pizza. I was inspired by this post of theKitchn. Mostly I used the technique of baking specified and was charmed by the fact that I had only vessel to wash. Almost making a pizza a one-pot dish!

I do like to make the pizza base at home because that gives me more control over what goes into the end product. I have tried to make this with 100% whole wheat flour but the resulting base was more like cardboard. I need to give it another try but for now I use half and half whole wheat and all purpose flours. I have also tried making the base with Rapid rise yeast - without proofing and setting aside for the rise and have been thoroughly disappointed with the end result. The base had a over powering yeasty smell owing maybe to the fact that the recipe called for using the whole packet of yeast (around 2.5 - 3 tsp). The base did puff up in the oven but not to my liking. After most of my failed attempts with rapid rise, I gathered up enough courage to get Active Dry Yeast and proof it. Its not that complicated and you get used to what to expect after a couple of times. 


Whole wheat Veggie Pizza with 7 spice base

Servings : 2 9-inch pizzas 
Prep Time: 2.5 hrs (including 2 hrs rise time)   Cook Time: 10 mins * 2

Whole wheat Pizza base

Ingredients

1 cup Whole wheat flour
1 cup All purpose flour
1.5 tsp Salt (or to taste)
1 tsp Active Dry Yeast
3/4 cup warm water (I microwave water for 20 secs on high)

Flavour variations to add into the dough (that I have tried)

- Dried basil leaves 
- Italian spice mix 
- Black pepper powder
- Indian spice mix - Cumin powder, Coriander powder, Carrom powder, black pepper powder
- All of the above (This is what I have used in my pizza here)

Instructions to make the base

  1. Stir in the yeast into warm water along with sugar. Let sit for around 10 minutes. In the meanwhile the water should become frothy and a little bubbly. The surface of the water will look bulged. This process is called "proofing". 
  2. Mix all the dry ingredients together.
  3. Add the yeast water to the dry ingredients and mix till the dough comes together. Use water as much as required, adding little at a time. 
  4. Do not knead too much. 
  5. Once the dough comes together in a ball, keep in a lightly oiled bowl and cover it with a plastic wrap or a lid.
  6. Keep the covered bowl in a warm place for 2 hours for the dough to rise. Top of the refrigerator seems to work the best. Hot air rises!

Instant Pizza sauce

Ingredients

2 Tomatoes / 5 heaped tsps of unfavoured natural tomato paste
2 garlic pods
1/2 tsp Salt
1/2 tsp black pepper
2 tsp Olive oil or Vegetable oil or Canola oil

Instructions

  1. Grind all the ingredients together adding 1 tbsp of water if required

Pizza Toppings

Cut up the following and more and keep aside
1 Medium Onion -chopped Julienne
1 Medium Capsicum - cut thin lengthwise
2 Medium Tomatoes cut into small pieces / 10 Cherry Tomatoes halved
1 cup sweet corn
12-16 thin slices of Jalapenos
2 cups Mozzarella cheese


Putting it all together

  1. Once the dough has risen, gently press into the dough and smooth it out into a ball. Do not rough up the dough.
  2. Preheat the oven to 450°F
  3. Divide the dough into two parts and keep one of them covered till the first one is done.
  4. Cut 2 parchment paper  squares of dimension 10-inch * 10-inch
  5. Keep a cookie sheet or inverted cake pan ready to bake the pizza. I don't own a pizza stone so cant really say what to do with that. Inverted cake pan makes it easier to cool and serve. 
  6. Now here is where I did it differently - Keeping one of the balls of dough on one parchment piece, flatten it by pressing it by hand. I did not need extra flour since I worked on parchment (cleaner). Continue to keep it on the parchment paper and roll it out with a rolling pin to desired thickness. I could get a near 9-inch circle at 1/4-inch thickness. Again be nice to the dough, it takes 5 minutes.  
  7. Cut the paper around the edge of the base as close to it as possible. 
  8. Now scoop half the sauce onto the center of the base and spread it outward with a spoon.
  9. Spread the toppings you have ready and sprinkle cheese right at the top.
  10. Slide the whole thing along with the paper onto the cookie sheet or inverted cake pan.
  11. Bake in the oven for 5 mins. 
  12. At this point remove the pizza from the oven and slide the paper out from under it. 
  13. Continue to bake for another 5 mins. 
  14. Remove from oven and cool on a wire rack for 5 minutes before serving.
  15. Repeat the process with the second pizza. 
My pizza is being YeastSpotted!
Related Posts Plugin for WordPress, Blogger...