Mar 25, 2015

Khandvi - A Gujarati snack

We are hungry. There is nothing that proves this more than the fact that I havent been able to click a single photograph of a dish before wolfing it down over the past months. Blogging requires discipline and blogging about food requires restraint both of which have been happily absent in my world for some time now. My little boy is 7 months old and time flew like the blink of an eye. My sweet daughter is nearly 7 years old and is discerning when it comes to food. But to my delight, she is imbibing tolerance in her approach to home cooked food. For her nothing compares to home cooked food which is a boon but can be a pain on days when I want to take off. I love her and love cooking for her. She is my biggest cheer leader when it comes to making new dishes. But she is not the worst critic since she will only procrastinate eating anything she doesnt like by looks or taste.

Yesterday I made a nice little snack for those after school hunger pangs. It was in her favourite colour too!
Khandvi is a gujarati snack made out of besan (chickpea flour) and butter milk mainly. Thin rolls of the cooked flour served seasoned, with or without a delicious filling. I thinned home made yogurt to obtain butter milk. Since bland or sweet tastes are not appreciated in my house, I spiced up the dish with heat from green chillies.

The only decision point in this dish is when the flour is ready to spread. And the other important note to remember is to use ungreased surface for spreading. I went through a few blogs which said the surface has to be greased but with that I could not roll at all. I wasted atleast 10-15 mins thinking the batter was not ready for the spread. But as soon as I wiped off the grease and spread, I could roll easily. Hence a word of warning.
Stuffing in khandvi is optional and can be left plain. Folks at my house did not relish it without the stuffing so I didnt have much of a choice but to add filling. I personally liked either.
I have also provided some pictures of the stages of the batter while cooking. Spreading and rolling pictures are also provided. Hope that helps.


Khandvi 

Recipe adapted from here
Servings: 16 - 18 rolls (2 inches in width)
Prep Time: 10 mins  Cook Time: 40 mins

Ingredients

1 cup Besan (Chick pea flour)
3/4 cup thick Yogurt
2 1/4 cup Water
2 tsp Lime juice
1/2 - 1 tsp Turmeric
Pinch of Hing
1/2 tsp Salt or to taste

Grind

3- 4 Green chillies
1/2 inch Ginger

Stuff

1 cup Coriander (cut fine)
1/4 cup grated Coconut (optional)

Season

3 tsp Oil
2 tsp Mustard seeds
2 Green chillies (cut very fine)
20 Curry leaves (cut very fine)

Instructions

  1. Coarse grind green chillies and ginger with a couple of spoons of water.
  2. Mix coriander and coconut required for the suffing
  3. Keep the flat spreading surface ready. I used backs of steel thali plates as well as aluminium foil and both worked very well. Do not grease them.
  4. Add water to the yogurt and mix well using a wire whisk or a fork.
  5. To this add the ginger chilli paste, turmeric, hing and salt and mix well.
  6. Now add the besan in while stirring and ensure that there are no lumps formed. Whisk till it is a smooth batter. Atlernately use an electric beater to make life easier.
  7. Cook this batter in a heavy bottomed vessel, on low heat, while continously stirring. The batter should not become lumpy or stick to the bottom of the vessel. 
  8. Continue to stir and cook while the batter becomes thick.
  9. The readiness of the batter can be checked by spread a spoonful on a plate. Wait for around five minutes for it to cool and then roll from the edge. If it rolls it is ready else cook some more. 
  10. When the batter is ready, work fast to spread it on the surfaces. The batter should not become overtly thick since it becomes difficult to spread. Ofcourse we do have a window of 5-10 mins. I took that much time to spread it on all available surfaces and the batter had not  become thicker or harder. 
  11. Take a blob of the batter and spread it using a spatula on to the flat surface. Spread it thin.
  12. Leave it to cool for nearly 10 mins.
  13. If making a stuffed khandvi, then spread the stuffing evenly on top of the cooled batter.
  14. Slice the spread batter into long strips, around 2 inches wide.
  15. Pick up the end of the strip, at the shorter end and start rolling. 
  16. Place all the rolls onto a serving plate.
  17. Now prepare the seasoning by heating oil in a heavy bottomed vessel, add in mustard seeds. 
  18. When the seeds crackle, add in finely cut green chillies and curry leaves. 
  19. Spoon the filling onto the rolls.
  20. Serve Khandvi warm.
  21. Khandvi can also be prepared ahead of time. Refridgerate the rolls, warm (I used microwave oven) and season before serving.

Oct 22, 2014

Spiced Mini Apple Pies


It is the beginning of fall here and the weather is absolutely lovely. Warm days compliment cooler nights. Happiness compliments the rash of colours in the nature around us. But the icing on the cake is that Deepavali compliments Halloween! Indian houses here in the US are beautifully decorated with fall adornments and halloween spooks and the entranceways are bathed perfectly in the light emanating from Deepavali diyas.
Such joy to share the festival of lights with all the pumpkins and "Mohabbatein" leaves!
Most of all, this is the first Deepavali for our two month old sonny boy. I simply could not allow the festival to roll by without celebrating to the maximum extent possible amidst all the newborn chores and chaos.

My dear family esp the hubby abhors sweet food in any form. Except for the occasional Mysore Pak. The darling dotzy has only now begun to relish sweets but mostly prefers baked goods to the traditional Indian fare. Hence I decided to kick start the Deepavali food fest with the Apple pie. It falls easy on the pallette and is so warm that it automatically fills you with love. Adding a twist to the classic and making it less sweet suits our tastes. Baking a pie is like an experience. The whole house is awash with the wonderful smell, the taste buds thank us and is appetizing to look at. I love the crusty flaky exterior of a pie so much that I could eat just the crust and be very happy. Given a choice of a 9 inch pie/cake or muffin sized portions I always tend to choose the latter since its easier to store and gets consumed real fast. Size is inversely proportional to the want in our house. That is how we ended up with mini spiced apple pies!

The pie dough recipe in this post is a keeper. It is extremely flaky and has a nice crust without being hard. It can be used as the go-to dough for all kinds of filling- spicy,veggie, sweet, salty. The recipe makes enough for a 9 inch pie base and the pie topper. Alternately it makes enough for 12 mini pie bases and their tops.


Spiced Mini Apple Pies

Servings: 12 mini pies (standard muffin size)
Prep Time: 45 mins (including cooling time)  Cook Time: 35 mins

Ingredients

For the Pie Dough

2 cups All Purpose Flour (or substitute half Whole Wheat flour, I have done this and it remains delicious)
1/4 tsp Baking Powder
1/8 tsp Baking Soda
1/4 cup Chilled Yogurt (replaces 1 egg)
3/4 cup Chilled butter cut into cubes (can be reduced to 1/2 cup if desired)
2 tbsp Sugar (increase to 5 tbsp if a sweet crust beckons)
2 tbsp Chilled Water
Pinch of Salt

For the Apple Pie filling

2 Gala Apples (the apple really held up well and did not get mushy when baked for 35 mins)
3-4 tsp Lemon Juice
1/4 tsp Cinnamon powder
1/4 tsp Nutmeg powder
1/3 cup Sugar

Instructions

For the Pie Dough


  1. Mix together the flour, baking soda, baking powder, salt and sugar
  2. Drop in the chilled butter cubes and lightly mix it into the flour till the mixture is crumbly. I used my fingers for this and it took around 5 minutes. 
  3. Add in the chilled yogurt and mix. The dough should start coming around.
  4. If required mix in the chilled water one tbsp at a time till a ball of dough is formed. 
  5. Do not knead the mix. Merely collect the dough to form a ball. 
  6. Cling wrap the dough and refrigerate for 30 mins.
  7. If refrigerated for more time the dough becomes harder. Allow dough to rest on the counter till it is pliable before using.

For the Apple pie filling


  1. Toss all the ingredients for the filling together.
  2. Do not mix it a lot in advance since the juice from the apples oozes out which could make the pie soggy. 

Making the Pie


  1. Preheat the oven to 350 F and grease a muffin tray lightly.
  2. I use a trick to make it easier to get the pies out after they are done - Place strips of foil in the muffin cup with ends hanging out. The pies can later be pulled out using the over hanging tabs. 
  3. Roll out the pie dough between two sheets of parchment (to make cleaning simpler) to a thin sheet. I kept it at 1/5 inch thick but it could be made thicker upto 1/4 inch. 
  4. To make mini pies, cut out rounds from the dough sheet around an inch bigger than the size of the muffin cup.
  5. Insert it into the muffin cup and lightly press against the walls of the cup to make a pie base. (It is easier to close the pie if the pie base juts out of the muffin cup.)
  6. Put in one and half tbsp of the filling into the pie base
  7. Cut out another round of dough which is slightly smaller than the first one.
  8. Cover the pie with this and press all around to seal the pie. 
  9. At the point you could make the edges fluted or press all around the edge using a fork.
  10. With a knife make small slits on the pie top to help bake the filling nicely. 
  11. Brush the top with some milk to prevent dryness while baking
  12. Bake at 350 F for 30 - 35 minutes till the top has browned and  you can see the filling bubbling inside. Mostly you could go by the heavenly smell and know its done!
  13. Serve warm or cold. We like both ways. 


Jun 4, 2014

Vegan Banana Nut Bread


In the recent weeks there hasnt been a situation of over ripe bananas in our house. But last week we went on a camping trip to Arkansas where I had carried a bunch of bananas but half a dozen remained uneaten given the variety of food we had there. We were an enthusiastic group making upma and bhelpuri among other delectables, at the camp. It was a lovely time beside the river. The river itself was shallow at the camp site and there were innumerable small size fishes swimming around our legs. The whole gang enjoyed playing in the water and swimming with the fishes.

By the time we came back home, due to the heat, the bananas were all over ripe and I had to find a way to use them without throwing out the whole lot. I mentioned banana bread and to my surprise my daughter was overjoyed. I have no idea what caused the change of heart in the non-sweet eater but I wasnt going to let this chance get away. I baked the bread that very night and as is always the case with banana baked goods, it came out very well. We all enjoyed a healthy dessert that night and it lasted well for the next four days with refreidgeration.

Vegan Banana Nut Bread

Servings: One 4*8 loaf
Prep Time: 10 mins Cook Time: 35 - 45 mins

Ingredients

4 very ripe bananas
1 cup Whole wheat pastry flour
1 cup All purpose flour
1/2 cup Vegetable oil
1/2 cup Sugar
1 tsp Vanilla essence
1 1/2 tsp Baking powder
1/2 tsp Baking soda
a pinch of salt
1/2 cup nuts (walnuts, almonds)

Instructions

  1. Preheat oven to 350 F
  2. Grease a 4*8 loaf tin with a little oil or line it with parchment paper
  3. Mash the bananas to fine and add in oil and sugar and mix well. Add in the vanilla extract and mix well.
  4. Sieve the flours, baking soda and baking powder and mix well and keep aside
  5. Add salt to the flour and mix well
  6. Add the dry ingredients to the wet ingredients and mix till it comes together. Do not overmix.
  7. Fold in the nuts
  8. Pour the mix into the prepared loaf tin and bake for 35 - 45 mins till a skewer inserted into the center of the bread comes out clean. (My oven took 45 mins)
  9. Slice it up and serve warm.
  10. It also tastes good as a base to a trifle or with ice-cream.

Bean and Oat Veggie Burger


When the need of the hour is to make your little one eat nutritious food without much fuss, the Burger is the way to go.  Simple, easy to make and extra delicious. Put a large dollop of tomato sauce inside the burger, for the kiddies and it goes in faster!


This burger is high in protein what with all the beans, lentils and oats. I used a combination of red kidney beans, black eyed beans, green channa dal, yellow channa dal, double beans, some other variety of bean that I dont recognise and green moong beans. The burger can also be made with very little oil and I mainly used oil to shallow fry the patty.
These burgers can be extra filling because of the beans. I served them with a portion of coleslaw instead of fries to round it off as a healthy efficient meal.


Bean and Oat Veggie Burger

Servings: 9 Patties
Prep Time:       Cook Time:

Ingredients 

1 cup Mixed beans
1/2 cup Green Moong beans
2 small Potatoes (optional)
1 small onion (cut in rings or jullienne)
1 tomato cut in slices
1 cucumber cut in slices
1/4 cup Oats flour
2 tsp Red Chilli powder
1/2 tsp Garam Masala
1/4 tsp Aamchoor (Dried Mango powder)
1/2 tsp Cumin Coriander powder
1/2 cup Coriander Chutney (optional)
1/2 cup Tomato sauce (optional)
9 tsp Oil
Salt to taste

Instructions

  1. Pressure cook soaked beans along with potatoes upto 3 whistles
  2. Mash the cooked beans and potatoes
  3. Add in all the spices and salt and mix well
  4. Add in the oats flour and mix well.If the mixture is still having a paste like consistency add in more flour to make it drier
  5. Take an onion sized piece of the patty mixture and pat it to a flat round of 2 1/2 inch diameter and 1/2 inch thickness
  6. Shallow fry on a heated skillet by drizzling a little oil around it
  7. Let it fry for a couple of minutes on medium-low flame, flip it and shallow fry the other side with a little bit of oil
  8. Once its nicely done, remove from skillet and keep aside
  9. Repeat the preparation of patty with the rest of the mixture.

To assemble the burger

  1. Slice a burger in half and toast it in the toaster for a minute to get it nice and crisp. Alternately roast the inside of the bun on a hot skillet with some butter lathered on
  2. Spread the inside of the bottom half with coriander chutney
  3. Top it with onion slices
  4. Place the burger patty on top of the onion, spread a little tomato sauce and top it off with tomato and cucumber slices
  5. Place the upper half of the bun right on top

Quick soak for beans

  1. Wash the mixed beans a couple of times in water
  2. Place it in a vessel and cover with water upto 2 inches over the beans
  3. Boil the water and then remove vessel from stove, cover and leave to soak for an hour
  4. The beans would have softened and are ready to be cooked further. Wash and ready to use.
  5. Soaking decreases the cooking time of the beans

Mar 10, 2014

Spiced Whoopie Pies


It is with absolute pleasure that I write this post. I am hosting the Feb '14 episode of the Home Bakers Challenge, another brain child of the ever so creative Priya Suresh.
In keeping with the occurence of Valentine's day I presented a variety of "to-bake" items to all those who were willing to participate. The underlying theme was to bake stuff which were different from the regular V-day fare including
1) French Macaroons
2)  Whoopie Pies
3) Neapolitan Cakes
4) Cheesecake Cupcakes
The main reason for choosing the list above were because I wanted to try out eggless versions of all of these. For various reasons my baking has become few and far between, therefore I managed to concoct only one bake. I had to choose the easiest recipe, for reasons strong, and since I cannot eat cheese at the moment I chose Whoopie Pies!


Before I ventured out to make a red velvet whoopie pie or any other sweet whoopie pie, I took a vote and my family unanimously chose a spicy fare. So I twisted the ingredients around to get a spicy cookie halves and even used onion-chive cream cheese filling for one. It turned out delicious. This was really a rare case of having only a few minutes before all the cookies and whoopie pies were cleaned off the plate! My joy knew no bounds! The aroma of ginger, cinnamon and nutmeg is exactly what you need in your house on a cold winter's day and mine was snowing to boot.


Spiced Whoopie Pies

Servings: 20 cookies or 10 Whoopie pies
Prep Time: 10 mins Cook Time: 12 mins

Ingredients

1 1/2 cups All purpose flour
3/4 cup Cane Sugar  (Or 1/2 cup Cane Sugar and 1/2 cup dark molasses)
3 tsp grated fresh Ginger (or 2 tsp Ground ginger)
1 tsp ground Cinnamon
1/4 tsp Nutmeg
1 1/4 tsp Baking Soda
3/4 tsp Salt
1/3 cup Vegetable Oil
1/4 cup Yogurt
1/3 cup Boiling water

Instructions


  1. Preheat oven to 350 deg F.
  2. Line a cookie sheet with parchment paper
  3. Combine flour, sugar, (molasses if used), ginger, cinnamon, nutmeg, salt, baking soda in a bowl
  4. Mix in oil, yogurt until well combined
  5. Pour in boiling water and mix until smooth
  6. Drop dough in balls on prepared cookie sheet with 1 inch space between each
  7. Bake in oven for about 12 mins untill slightly puffy and golden
  8. The cookies will be soft when removed from the oven and will continue to harden a bit. 
  9. Cool on the cookie sheet for 5-7 mins before cooling completely on a rack
  10. Once the cookies have cooled completely apply filling on the bottom of a cookie and place another similar sized cookie on top of the filling. 
  11. Chill it for 10 mins in the fridge if its gets a little runny or is a warm day
  12. I used store bought cream cheese and Nutella for the filling. The sweet of the chocolate and then tang of the cream cheese blended perfectly with the spiced cookies!

Mar 1, 2014

CWS Event - Cooking with Seeds - Avarekaalu/Hyacinth Bean

I am excited to announce my first event as a guest host! I am hosting the CWS (Cooking with Seeds) event for the month of March '14. This event, or should I call it tradition, was started by Priya Suresh of Priya's Versatile Recipes and anyone who looks for recipes online knows this website only too well. As the name suggests she has the most versatile spread of delectables on her blog!
The seed I choose for the event is the "Avarekalu". Also known as the Hyacinth Bean, it is one of the tastiest seeds and can be incorporated into a variety of everyday recipes. The seeds can be used as is or the skin can be removed to use the soft flesh parts inside. The most common recipes include Sambhar, Upma, Pongal, Curry, Masala. All we need to do is cook using the seed and our imagination and link your entry to this post.
                                                    (Thanks to Priya Suresh for the logo)
The event rules are as follows…
  • The event runs from 1 to 31 March 2014. 
  • You can cook anything from. It can be a starter, main dish, side dish, dessert or any other recipes.
  • Bloggers, please link your recipes using the linky tool below.
  • Usage of logo is appreciated for all entries as it would help spread the word. 
  • I would request linking Vegetarian recipes only since my blog is strictly vegetarian.
  • You can submit as many recipes as you wish.
  • Archived recipes can also be submitted when updated with the event details.
  • Not mandatory, but will be highly appreciated if you can like us on Facebook for updates and recipes.
  • Non bloggers can send in their recipes to my email siriroop@gmail.com with following details: your name, recipe name and details.                       

Dec 15, 2013

Vegan Jewish Apple Cake


Home Bakers Challenge presented a very interesting recipe of apple cake and it was to be Jewish. At the outset, the recipe did not present anything "different" to classify it as Jewish and I was intrigued. After going through a lot of forums, I gleaned that one of the rules of Kashrut (Jewish Dietary law) upon which Kosher foods are based, is that Meat and Dairy should not be mixed at a meal. This might explain why this cake is called so because it uses oil instead of butter and does not use any milk in it.

In my drive to make it Egg free, I have substituted the eggs simply with Ener-G replacer.
I have also substituted half the fat with applesauce making this a very healthy recipe. The cake keeps well in the refridgerator, in an air tight container, for atleast a week from personal experience.
I was overstocked with apples left over from a fruit salad made for a pot-luck, languishing in the fridge till this challenge came along to rescue them!

Vegan Jewish Apple Cake

Servings: 1 9-inch cake
Prep Time: 10 mins Cook Time:

Ingredients

3-4 Medium sized Apples (I used Jonathan but granny smith or honey crisp should work very well too)
3 cups All Purpose Flour
2 tbsp Ener-G replacer + 8 tbs Warm Water (replaces 4 eggs)
1 1/2 cup Sugar (I used 1 cup since the apples were sweet)
2 1/2 tsp Baking Powder (If double acting baking powder use half the quantity)
1/4 tsp Salt
1/2 Cup Oil
1/2 Cup Applesauce
1/4 tsp Cup Orange Juice (Tropicana works fine)
2 tsp Vanilla Essence

2 tsp Cinnamon
3 tbsp Confectioner's (Fine) Sugar

Instructions

  1. Preheat the oven to 350 F
  2. Line a 9-inch round cake pan with parchment
  3. Combine 2 tsp cinnamon and 3 tbsp of fine Sugar and keep aside
  4. Peel, core and cut the apples into 1-inch pieces. I made the pieces smaller because my family wouldnt enjoy biting into soft big pieces of apple. 
  5. If cutting the apple before hand, drizzle 2 tsp of Lemon juice on coat the pieces with it. This will prevent browning.
  6. Prepare the egg replacer as per instructions on the product. If using Ener-G then pour the powder in the warm water and stir till well combined. It should become creamy after mixing. Keep aside

  7. Mix together flour, sugar, baking powder and salt in a container.
  8. Mix together the oil, applesauce. orange juice, egg replacer mix and vanilla essence.
  9. Add the wet mixture to the dry and mix till just combined. 
  10. Pour half the batter into the prepared cake pan. Top with 1/2 the apple pieces and sprinkle half the cinnamon-sugar mixture on it.
  11. Pour the rest of the batter into the pan and top with the remaining apple pieces and sprinkle the remaining cinnamon-sugar mixture on it.
  12. Bake at 350 F for 60-80 minutes.

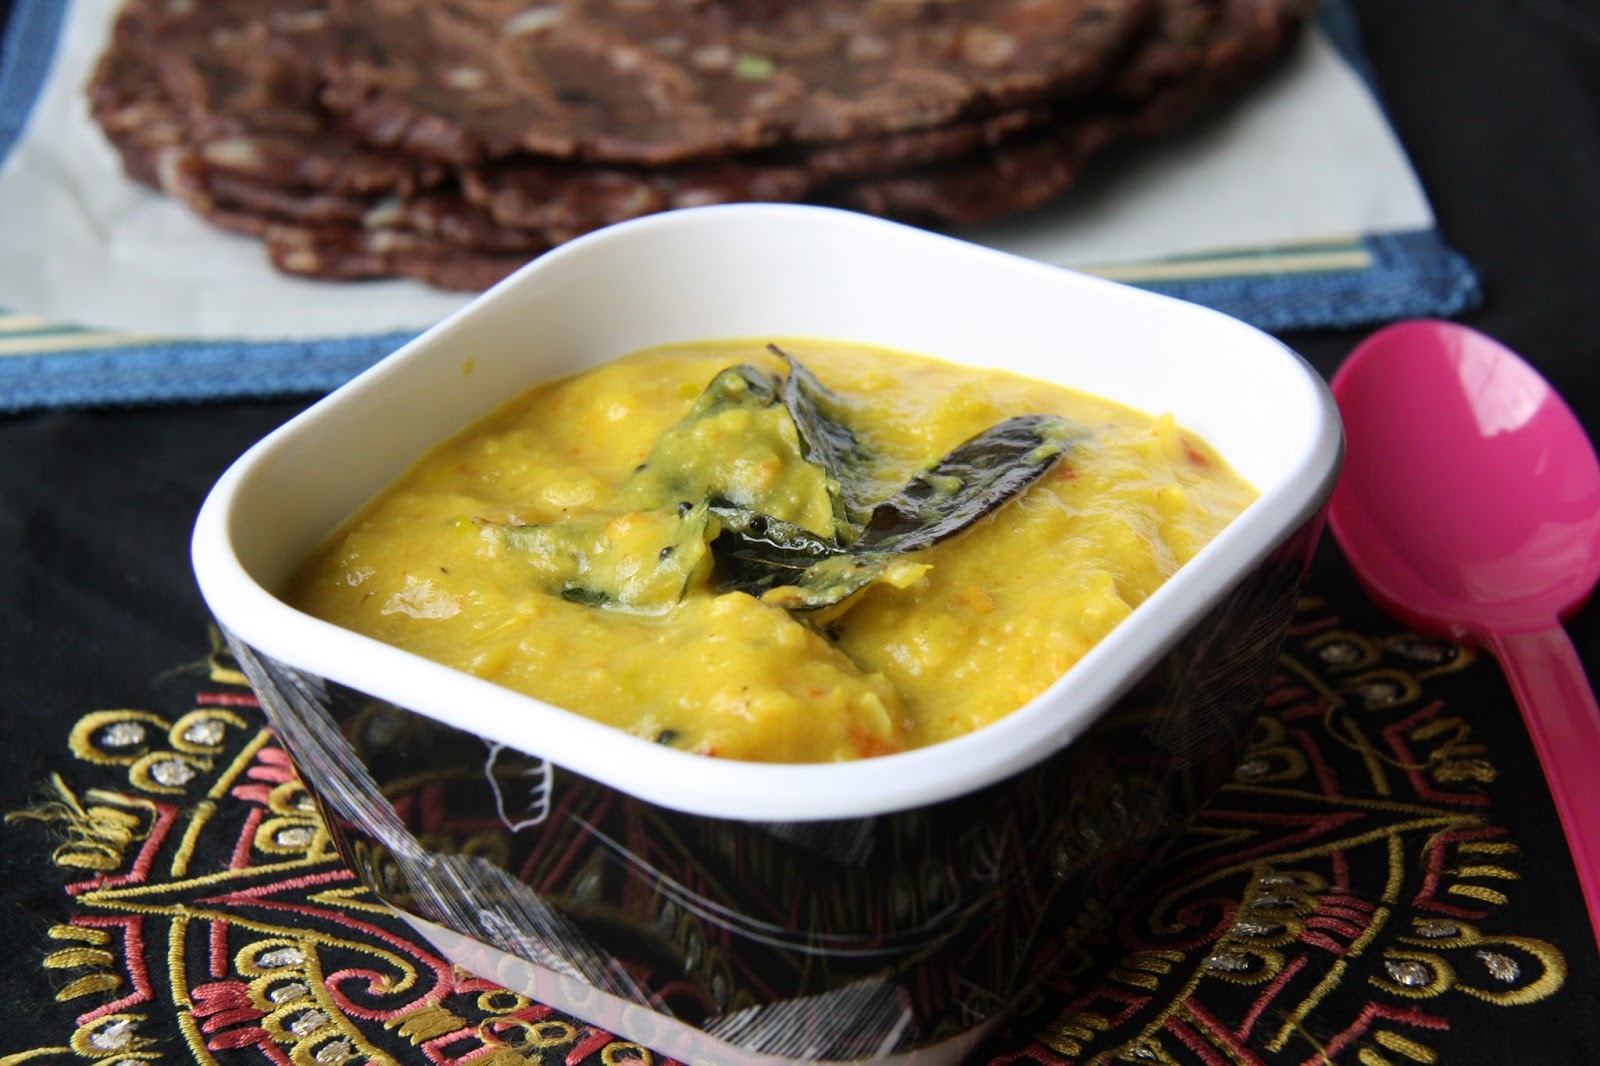
Hitikida Avare Sambhar (De-skinned Hyacinth beans Curry)


T will be proud to know that I figured out the botanical name of the delectable Avarekaalu  - It is called the Dolichos Lablab!
While Bengaluru orignally got its name from the boiled beans served to a Hoysala king who had lost his way hunting, Benda-kaalu-ooru (boiled beans place) has gone on to become the Silicon Valley of India thereby sending a sizeable amount of its populace to distant lands where this vegetable is never grown. But, thanks to a lot of enterprise in the food sector catering to the Desi populace in said distant lands, frozen varieties of the beans are easily available in most of the Indian grocery stores. We can now find this tasty bean in the frozen foods section under the name Surti Lilva Papdi. It does come with a setback of extremely small sized beans which makes it tough to de-skin. I simply use the beans whole and skip the step of de-skinning it because it would leave behind not much of the beans. Nevertheless we plough on with vigour to create a dish which has been the hallmark of my mother-in-law's cooking repertoire. She is the queen of the kootu which I am going to describe here while (pardon me) salivating for a taste of it.

Hitikida Avare simply means beans whose skin has been removed. It does require soaking of the beans overnight to make the skin soft enough to be removed. So plan in advance.

Hitikida Avare Sambhar

Servings: 6 cups of Sambhar or Curry
Prep Time: 12 hrs including the shelling, overnight soak and de-skinning   Cook Time: 30-40 mins

Ingredients

6 cups of Avarekayi (Beans with shells) or enough to get 2 cups of shelled beans
1 medium sized Tomato

To Grind

2 1/2 tsp Coriander seeds
1/2 tsp Channa dal
1/2 tsp Urad dal
1 tsp Cumin seeds
4 Red Chillies (adjust to taste)
2 tbsp Coconut
1/2 Onion
4 Garlic pods
1 inch Cinnamon stick
2-3 Cloves
1 Star Anise (masala hoovu)

Instructions

Prep-work

  1. Shell the beans from the avarekayi pods (skip the step if using frozen shelled beans)
  2. Soak the beans overnight or for 6 hours in water, with water reaching above the level of the beans
  3. To remove skin - Hold the soaked bean between thumb and forefinger and gently apply pressure on it till the innards pop out of the skin. Discard the skin and save the de-skinned beans. 
  4. Tip : Aim the bean down towards a container so that the de-skinned beans pop right into it. 
  5. This step can be a family activity since it is a time consuming process. Kids will have a lot of fun with the beans flying all around them after popping out of the skin!
  6. I will post pictures of it, the next time I am around in India when this is in progress. 

Boil beans

  1. Boil the shelled, de-skinned beans in water along with some salt till soft to the touch. Do not over cook it else it will all get mashed. 
  2. Keep the beans and the water aside.

Grind the Masala

  1. Dry roast the coriander seeds, channa dal, urad dal and jeera in a heavy bottomed vessel and keep aside.
  2. Dry roast the coconut till lightly browned and dry. Keep aside
  3. To the same vessel, add a tsp of Oil (there will be some oil left over from the coconut) and shallow fry the onion, garlic, red chillies, cinnamon, cloves and star anise. 
  4. Once all the spices are cooled, grind them all together with 4 tbsp of boiled beans.

Bringing the Sambhar to life

  1. Add the ground masala to the boiled beans and water and cook on medium heat for around 5  minutes till combined
  2. Add the chopped tomato and allow the sambhar to boil for another 10 minutes. Add water to get the required consistency of sambhar. Do not make it too thick or too watery.
  3. Adjust the salt
  4. Temper with Mustard seeds and a pinch of asafoetida in a tsp of Oil
  5. Serve hot with Rice or Ragi Mudde
  6. Personaly I like it with chapathi, dose also. 

Ragi Mudde (Finger Millet Balls)


Ragi (Finger Millet) is that wonder grain to which peans ought to be written. It is the richest source of calcium and helps builds bone strength in our bodies and therefore essential for growing children and also in older adults. It is a wonderful source of anti-oxidants and has a good amount of dietary fiber which ensures that we feel fuller for a longer time thus reducing the chances of snacking in between meals or over-eating. The slow digestion aids in controlling blood sugar levels and therefore can be a staple in a diabetic's diet. It has a very small percentage of fat but even then its unsaturated fats.
Ragi is one of the best sources of protein providing many of the essential amino acids which should be reason enough to be incorporated into all vegetarian diets. It is one of the main sources of Methionine which helps reduce cholesterol, reduce fat inside the livers and help protect kidneys.
When sprouted, Ragi develops Vitamin C which helps in absorption of the Iron content in the grain.
Ragi can be prepared in many number of ways,as a ball, sweet or salty porridge, flatbreads, sweets especially with jaggery, each very tasty!
In this post I will talk about making the easiest preparation with Ragi called the Mudde. It is a staple in Karnataka especially among the rural folk. But I think it is about time that the urbanscape adopted this wonder grain into their diets and reap the benefits.

Ragi Mudde (Finger Millet Balls)

Servings: 4 balls
Prep Time: 5 mins Cook Time: 10 mins

Ingredients

1 1/2 cups Ragi Flour
3 1/2 cups Water
Salt to taste
1/2 tsp Oil (optional)

Instructions

  • Heat water in a vessel and along with salt, oil and 4 tbsp of Ragi flour.
  • When the water starts to boil (notice bubbles appearing through the flour) stir in the remaining flour.
  • Use a  1-inch thick wooden dowel or the back of a big wooden spoon (which wont break under pressure) to combine the flour well into the water.
  • Allow it to cook for 5 mins and remove from stove. By now the raw smell of ragi must be replaced by a cooked smell.
  • Let it cool for 2-3 mins (this step is optional but my hand cant take the heat)
  • Take a large blob of the mix and place on a slightly greased flat plate. (1/2 tsp of Oil)
  • Now wet your hands with water and shake off the excess.
  • Working quickly knead the dough a couple of times and then start to roll it into a ball. 
  • You might have to dip your hand in water to prevent the dough from sticking to your hand. Optionally work with greased hands.
  • Roll the ball in your hands till the surface is smooth.
  • Repeat with the rest of the flour. 
  • Serve hot with a side dish like Gojju, Sambhar or Hidakbele Saaru which have a watery consistency and not too thick.
  • To eat, pinch off a piece of the mudde from the ball, soak it in the side dish and pop it in your mouth. Ideally the mudde should be swallowed without chewing. although I must admit I havent mastered that yet.

Nov 28, 2013

Pumpkin Erissery (Kerala style curry)


I made it for the first time many months ago and did not think much about posting the recipe. A month earlier I was routinely asking my daughter what she wants me to make for lunch. Its a question which comes up every now and then in my house when I am out of ideas on what to make. Imagine my surprise when she says "Amma, make that pumpkin thingy you made long back"! First of all I did not think she would remember a specific dish made once many months ago and second  I did not have pumpkin in the refridgerator. So I took a rain check on it and made her favourite pulav instead.
In keeping with this week's Thanksgiving run-up I decided to bring the vegetable home and make her favorite curry today.

Pumpkin Errisery is really simple to make and turns out into a delicious dish. I think it would be a perfect side dish and looks awesome in the middle of a spread. So make it for a pot luck or party  and get some kudos while taking it easy!

Pumpkin Errisery (Kerala Style Curry)

Servings: 3 cups
Prep Time: 10 mins Cook Time: 20 mins

Ingredients 

To Boil

4 cups Pumpkin (cut into 1-inch cubes)
Salt to taste
A pinch of turmeric

To Grind


1 tsp Cumin seeds
3 Green Chillies
1/4 cup Coconut

To Temper

1/2 Medium onion or 4-5 Shallots
1 tsp Mustard seeds
1 tsp Urad dal
2 Red Chillies
8-10 Curry leaves
3 tsp Oil

Garnish

2 tbsp Coconut

Instructions

  1. Grind coconut, green chillies and cumin seeds to a coarse mix and keep aside.
  2. Boil pumpkins in water till nearly soft along with turmeric and salt. 
  3. Add the ground paste to the pumpkins and continue to cook on simmer till pumpkins are well done.
  4. Heat oil in a heavy bottomed vessel and add mustard seeds.
  5. When the mustard seeds splutter, add red chillies and urad dal and saute for a couple of minutes.
  6. Add in onion and saute till transluscent and then put in the curry leaves.
  7. Mix well and pour the tempering on top of the cooked pumpkin
  8. In the same heavy bottomed vessel fry 2 tbsp of coconut till they are crisp and mix it into the pumpkin curry.
  9. Mix well and serve with hot rice or chapathi

Nov 27, 2013

Gori Manchurian


Yes, you read it right. There is no spelling mistake in the title of the post. I accidentally made an important discovery which will come in very handy to serve a vegetable which is inherently so dry that it usually gets relegated to second cousin status as compared to beans. Cluster Beans or Gori kayi as it is called in Kannada is a thin and dry variety of beans.
I used to be an extremely fussy eater as a kid and gori kayi was one of the many vegetables that I did not like to eat. Adding to my misery was the abundance of this vegetable in the local market in Hyderabad, thus finding its way to my plate more enough than I would have liked. My mom tried to encourage me in various ways to eat more... well lets just say eat. With gori kayi she found an ally in numbers.She always told me that eating gori kayi would make me really good at math! That was a good reason for me to eat it all up although I might say that 101/100 times I might have got my numbers mixed up! I did hallucinate about pieces of gori kayi making its way up my blood vessels to the math controlling part of my brain.
Coming back to the recipe, it was a fridge clean out session where i discovered a bag of gori kayi and pizza sauce left over from last weekend. The rest as they say is Manchuristory.


Gori Manchurian

Servings: 2 cups
Prep Time: 25 mins   Cook Time: 15 mins

Ingredients

2 cups of Cluster Beans (Gori Kayi in Kannada)
1/2 Medium sized Onion
1/2 cup Toor Dal
1/2 cup Pizza sauce
1/2 tsp Mustard seeds
1/2 tsp Cumin seeds
A pinch of turmeric
3 Green Chillies cut lengthwise
3 tsp Oil
Salt to taste

Instructions 

  1. Cut cluster beans and onion into small pieces.
  2. Wash the toor dal under running water, atleast three times
  3. Pressure cook toor dal and cluster beans and keep aside
  4. Heat oil in a heavy bottomed vessel and add in mustard seeds. 
  5. When the mustard seeds splutter, add in green chillies and cumin seeds and saute for a minute
  6.  Add in onion and saute till transluscent.
  7. To this, add the pizza sauce and fry for a few minutes till the raw smell of tomato has gone
  8. Mix in the pressure cooked cluster beans and toor dal. Add salt and continue to cook for a few minutes till the first boil.
  9. This curry tastes good with roti or chapathi or plain rice. I enjoyed eating it as is!

Instant Pizza sauce

Ingredients

2 Tomatoes / 5 heaped tsps of unfavoured natural tomato paste
2 garlic pods
1/2 tsp Salt
1/2 tsp black pepper
2 tsp Olive oil or Vegetable oil or Canola oil

Instructions

  1. Grind all the ingredients together adding 1 tbsp of water if required

Nov 26, 2013

Pumpkin Soup Curry flavored


Here comes yet another post using the pumpkin puree that I made day before yesterday. After a tiring day pumpkin soup is something you could snack on to both relax and fill your tummy. It is wholesome and the curry flavour gives it an extra spicy kick. This soup can be made as sweet or spicy as desired. 

Pumpkin Soup Curry flavored

Servings: 2
Prep Time: 5 mins Cook Time: 20 mins

Ingredients

1 cup Pumpkin Puree
1 cup Water
1 tbsp Butter (or less) or 1 tbsp Oil
1 medium sized Onion
2 Garlic pods
1/2 inch piece Ginger grated
1/4 tsp Nutmeg powder
1/4 tsp Cinnamon powder
1/4 tsp Coriander powder
1/4 tsp Cumin powder
A pinch of turmeric
2 Cloves whole
2 tsp Red Chilli powder
Few coriander leaves cut fine
Salt to taste

Instructions

  • Cut onions and garlic fine
  • Heat the butter in a heavy bottomed wok and saute the onions till transluscent.
  • Add garlic and ginger and saute for a couple of minutes
  • Add in all the spices and saute for a couple of minutes
  • Pour the pumpkin puree along with water into the wok and continue to boil for a few minutes.
  • Add salt and simmer for five minutes.
  • Garnish with coriander or parsley
  • Serve the soup hot

Nov 25, 2013

Spiced Eggless Pumpkin Quick Bread

Pumpkin bread is the kind of food that you want to take with you when your mind wanders into nostalgia. It evokes a lot of emotions, most of all happiness. Done with the right spices, this wonder food, which is a big source of Vitamin A, can be relished as a snack any time of the day.
With my resolve to post a pumpkin recipe everyday of this week leading to Thanksgiving day, I made a list of all the dishes I wanted to prepare and this bread topped the list. It is an extremely simple quick bread which means there is no wait time required between making the batter and baking.


The pumpkin bread is symbolic of warmth. The recipe below does not make an overtly sweet bread. Its a sure-fire crowd pleaser and I am very happy to report that the two food critics in my house absolutely loved it! I recommend it as a kid friendly recipe and it can easily make its way into the school snack box.

Spiced Eggless Pumpkin Quick Bread 

Recipe adapted from Gayathri's cookspot
Servings: 1 9-inch loaf
Prep Time: 10 mins Cook Time: 60 mins

Ingredients 

1 cup All purpose Flour
3/4 cup Whole Wheat Pastry flour
1 cup granulated Sugar
3/4 tsp Baking Soda
1/4 tsp Double acting Baking powder
1/2 tsp Salt
1/2 tsp Nutmeg
1/2 tsp Cinnamon
2-3 Cloves (If using powder then 1/2 tsp)
1 cup Pumpkin Puree
1/2 cup Oil
3 tbsp Honey
3 tbsp Water
Chopped walnuts (handful to 1/2 cup)

Instructions

  1. Preheat oven to 350 deg F. Line a 9 inch loaf tin with parchment paper or grease with oil.
  2. Sift together all purpose flour, whole wheat pastry flour. sugar, salt, nutmeg, cinnamon, cloves together in a bowl.
  3. In another bowl mix together pumpkin puree, oil, water, honey
  4. Add the wet ingredients into the dry ingredients to form a thick batter. Mix only till well combined, do not overmix.
  5. Fold in the walnuts
  6. Fill the loaf tin with the thick batter and lightly spread to be even topped
  7. Bake at 350 deg F for 60 minutes till a skewer inserted comes out clean with no batter sticking to it. Check from 55 mins to see if it is done
  8.  Remove from oven and cool in the loaf tin for 5 minutes. Continue to cool on a wire rack.

Nov 24, 2013

Pumpkin Puree

'Ts the week where all of America is thinking about recipes. After all its the biggest culinary expedition of the year. Thanksgiving! 
Vegetarians and Vegans have a lot of resources on the internet to ensure they dont have to forego joining in the celebration. Potatoes, Beans and Pumpkin are some of the vegetables that find their way to the dinner spread and creatively so. My take is that there is only so much you could stuff into a turkey so all the creativity gets unleashed on accompaniments and dessert. I have decided to dedicate this week to recipes which could easily adorn the Thanksgiving banquet.
What better way to do this than the rotund pumpkin.

As luck would have it I had a huge pumpkin leftover from the Halloween times which had failed to make it to a Jack-o-Lantern. I had to use it before it spoilt. Does a pumpkin spoil? I dont know but I wasnt going to find out today. I took it out of the refridgerator and what ensued after that was a 40-min ordeal to crack it open! The shell was extremely hard and I had never encountered a pumpkin with such a hard exterior. Armed with a sharp knife and gritting my teeth I started puncturing through the vegetable with T reminding me of the fact that I am a klutz and should be careful. I have a history of slicing right through my hands so I dont blame him for being worried. Once I had it open it took me an indecisive 5 minutes to resolve making a puree out of the whole thing instead of trying to skin it for a curry.
Pureeing a pumpkin is really simple as you will read later on. Once done, it could be frozen for a few months atleast and used whenever required. The puree could be used in baking recipes, soups, casseroles etc.

Pumpkin Puree 

Servings: 4 cups from a pumpkin the size of a football.
Prep Time: 5 mins Cook Time: 1 hr 30 mins (includes waiting time)

Ingredients

1 Pumpkin (size of a football)

Instructions

  1. Cut the pumpkin into quarters
  2. Place it on baking tray
  3. Bake at 350 deg F for an hour
  4. Allow it to cool and then scrape the pulp out of the skin
  5. Blend the pulp in a food processor or mixer to a paste. Use a couple of tbsp of water if required.
  6. Store in an airtight container. Freeze for longevity.

Oct 10, 2013

Spooky Witches Fingers (Eggless)


Its that time of the year where scary and spooky are mainstream. Halloween brings with it a carnival kind of atmosphere where everyone wants to pretend to be someone else. Going by the number of Halloween Express shops that open up in October, its a mad rush to get out of the skin of one's own life. Before my blog goes all philosophical and analytical on this top I will turn the focus back to food. Pumpkins are everywhere for halloween but not really as a dish. Jack-o-Lanterns adorn many lawns and door steps. Wildly imaginative cookies and cupcakes are also the norm.

I decided to bake the spooky witches fingers to celebrate the Halloween mood early and also as part of the Home Bakers Challenge. The recipe here is a keeper and gives consistent good results. My biggest tip while baking cookies is to chill the shaped dough for atleast 5 minutes before popping it into the oven. This slows down the spread and ensures you dont have to get it off the tray with a spatula.
My daughter refused to even come close to them in the beginning but enjoyed eating it after we demonstrated that they were really harmless. But the whole episode made me gloat with pride at such a life like creation! The hubby who, as my blog readers will know, hates sweets also devoured many many of these fingers.

Spooky Witches Fingers (Eggless)

Recipe Adapted from here
Servings: 30 pieces
Prep Time: 30 mins Cook Time: 25 mins per batch

Ingredients 

1 1/3 cup All Purpose Flour
1/2 tsp Baking Powder
1/2 tsp Salt
1/2 cup Butter (softened)
1/2 cup Sugar
Ener-G Egg Replacer equivalent of 1/2 egg
1/2 tsp Vanilla essence
30 Whole Almonds with skin

Instructions


  1. Combine the flour, baking powder and salt. Sieve and set aside.
  2. Whisk the sugar and butter till well combined (whitish and fluffy). This took me around 3-4 minutes.
  3. To this add the egg replacer and vanilla essence and whisk for another couple of minutes.
  4. Add the dry mixture in parts to the wet mixture and mix till combined.
  5. The whole thing comes together as a soft dough. Cover and refridgerate for 20 minutes.
  6. Meanwhile preheat the oven to 325 F.
  7. Remove small portion of the dough at a time from the fridge, shape into desired form and place an inch apart on a cookie tray.
  8. Refridgerate the cookie tray for atleast 5 minutes and then bake in the oven for 20-25 minutes. Remove when base is lightly browned. 
  9. Leave the cookies to cool on the tray for 5 minutes and then cook on a wire rack. 

To shape like a finger


  1. Pinch of a small ball of dough and place on parchment paper.
  2. Working quickly press and elongate to a log of around 4 inches long and 1/4 inch diameter. 
  3. Pinch the edge on one side to give a tapered look. That's the nail side
  4. Pinch in the log along the length
  5. Using a blunt knife (butter knife) make indentations cross-wise on the log to give it a natural look
  6. Press a whole almond on the tapered edge

Sep 17, 2013

Vegetable Au Gratin


We had a French inspired dinner last Sunday with Croissants (store bought) and Vegetable Au Gratin on the side. A table laid outdoors, bare with no distractions of threads and cutlery, completed the experience. Soaking in the setting sun with a wonderfully tasty spread is something we all can never have enough of.
The french expression "au gratin" refers to anything grated on top of the dish. Very commonly cheese.
Although this dish looks very sophisticated and prim, its one of the easiest things to prepare. And guaranteed to turn heads at a luncheon or pot luck.

Again, its a great way to get those vegetables into kids' tummies. The recipe I have used is inspired from here. I used beans, carrots, kohlrabi, spinach(a lot) and potatoes for veggies but the options are limitless. Am sure shallow-fried onion would add a dash of intense flavour to the dish.

Vegetable Au Gratin

Servings: 2
Prep Time: 10 mins Cook Time: 20-25 mins

Ingredients 

1 cup Boiled Vegetables
1 cup Spinach cut washed and cooked
1 cup White Sauce
1 tbsp Cream Cheese (optional)
1/2 cup (or lesser) cheese (I used Mozzarella)
1 tsp Garlic powder (optional)
1 tsp Cumin powder (optional)
1 tsp Coriander powder (optional)
1 tsp Black pepper powder
Salt to taste

For 1 cup White Sauce

1 tbsp Butter
1 tsp All purpose Flour
3/4 cup Milk
1 tsp Black pepper powder
Salt to taste

Instructions


  1. Preheat oven to 400 F
  2. Keep a shallow baking dish (3 inches * 5 inches * 1 inch) ready
  3. Mix cream cheese and 1 tbsp of mozzarella cheese to the white sauce.
  4. Add in the spices, garlic powder and salt and mix well
  5. Fold in the boiled vegetables and spinach
  6. Pour this mixture into the baking dish, sprinkle the remaining mozzarella cheese on top
  7. Bake at 400 F for 20-25 mins till the top has become golden brown.
  8. Leave it in the oven with the door open for another few minutes (optional)
  9. Remove from oven and allow to cool

How to make White Sauce


  1. Heat butter in a heavy bottomed vessel, add all purpose flour and mix till it becomes frothy on low-medium heat
  2. Add 3/4 cup Milk and stir continuously till the sauce thickens. Around 5 mins
  3. Add in black pepper powder and salt to taste

Eggless Blueberry Coffee Cake


At the outset let me share with you that I dint expect this to be a hit. But thats exactly what it turned out to be  and more with my daughter lapping up every bit of it with gusto. This cake is a very simple preparation and I made it on a Saturday night while chatting with a friend which made it all the more enjoyable.
Coffee cakes are usually moist and tender and come out of the oven ready to eat. No frosting required. Although having a streusel on top or glaze or chocolate syrup drizzle are standard dress-ups for it, it can nevertheless be enjoyed without any of those.


I chose to not top it with anything and also chose to make it low calorie by substituting apple sauce for a lot of the butter. The taste of apple is hardly noticeable especially if its a fine paste. What I forgot to add in was nuts and I am going to do it the next time. Almonds would complement the blueberries very well, especially the shavings.


Its an easy way to get kids to eat fruits and nuts, trust me!

Eggless Blueberry Coffee Cake

Servings: 1 9-inch cake
Prep Time: 15 mins Cook Time: 40 - 50 mins

Ingredients 

2 cups All Purpose Flour
1 cup Blueberries (if frozen do not thaw)
1/3 cup Butter
1/2 cup Applesauce
3/4 cup Sugar
1 tsp Baking Powder (I used 1/2 tsp Double acting)
1 tsp Baking Soda
1/4 tsp Salt
1 cup Yogurt
1 tsp Vanilla extract (I accidentally put in nearly 2.5 tsp of extract and it was still very yummy)

Instructions 


  1. Line a 9-inch cake tin with parchment paper or grease it and keep aside
  2. Preheat oven to 350 F
  3. Mix flour, baking powder, baking soda, salt in a bowl and set aside
  4. Cream butter and sugar by hand or with a beater.
  5. Add the applesauce and vanilla essence and continue to beat
  6. Add the dry ingredients to the wet ingredients alternating with yogurt.
  7. Combine well using a whisk but refrain from mixing too much. 
  8. Add in the blueberries and fold in. Be gentle since they pop easily. 
  9. Pour the batter into the prepared cake tin and bake it at 350 for 40-50 mins till a skewer inserted in comes out clean. 
  10. Remove from oven and cool it in the tin for 5 mins and then continue to cool it on a wire rack. 

How to make Applesauce at home


  1. Peel and core 2 medium sized apples, cut them into cubes and boil the pieces in 1/2 cup water till soft and mushy. About 10 mins.
  2. Once cooled, grind the softened pieces into a paste or mash with a fork to get 1 cup Applesauce

Sep 15, 2013

Green Tomato Pachadi Andhra Style


One of my friends suggested that I should try a chutney using green tomatoes. Until then I had never really used green tomatoes to cook and I wasnt sure of the taste either. But having once tried the chutney I promptly bought more of it and made it again the next week. Its going to be one of my go to chutneys since its easy to put together and less on fat.
Green tomatoes impart a very tangy flavour which needs to be balanced. I used fenugreek seeds for that reason.

Green Tomato Pachadi Andhra Style

Servings: 1 cup
Prep Time: 5 mins Cook Time: 30 mins (including cooling time)

Ingredients

1 Big sized Green tomato
1/4 tsp Fenugreek seeds
2 tsp Urad dal
3 Green chillies
2 Red chillies
4 tsp Oil
1 tsp Mustard seeds
Few Curry leaves
Salt to taste

Instructions


  1. Heat 3 tsp oil in a heavy bottomed vessel or wok. 
  2. Add the fenugreek seeds and urad dal and fry till the urad dal gets lightly browned
  3. To this add the cut tomatoes, salt, green chillies and red chillies and saute till the tomatoes turn mushy.
  4. Once cooled, grind the cooked tomatoes but not to a fine paste. 
  5. Temper with mustard seeds and curry leaves.

Ragi Rotti (Finger Millet flatbread)


If there is one thing which is quintessential Karnataka food it would have to be Ragi. Karnataka is one of the biggest producers of Ragi in India. And no wonder that almost every kannada household would stock it in their pantry to readily whip up Mudde (cooked Ragi ball) or Rotti (Ragi flat bread) best eaten with Bussaru or Chutney respectively.


I prefer the Rotti over Mudde and make it often at home. It is one of the best after school snacks for kids to restore their energy and to provide them with nutrition without fuss. I tend to flavour it with onion, green chillies, coriander leaves and optionally spices. It is easy to make and easy to eat and is one of the healthiest dishes to be had.


Ragi Rotti (Finger Millet flatbread)
Servings: 8 Rottis
Prep Time: 10 mins Cook Time: 5 mins (for each Rotti)
Ingredients
2 Cups Ragi flour
1 Medium Onion
2-3 Green Chillies
A bunch of coriander leaves
1 cup Spinach leaves
1 cup Water
1 tsp Cumin powder (optional)
1 tsp Coriander powder (optional)
Salt to taste
Instructions
Cook the spinach leaves (Microwave or stove-top) and grind to a fine paste.
In a bowl mix together flour, salt and spices.
Add to this minced onion, green chillies, coriander leaves and mix well.
Add in spinach paste till crumbly.
Add water, a little at a time, to make a soft dough.
Keep aside covered for 30 mins if desired.
Wet a small piece of cloth (handkerchief) completely and squeeze to remove excess water
Spread it out on a flat surface.
Place a dough ball on the wet cloth and flatten it using fingers dipped into water
Slide the cloth along with the flattened dough and flip it onto a hot skillet
Drizzle  oil around the flattened bread and cook on both sides.
Tip :- If the flour on any part of the bread shows up white, it isnt cooked. Spread a drop of oil or water and cook the spot. 

Sep 7, 2013

Pumpkin Spiced Buttermilk Scones (Eggless)


It was a lazy weekend afternoon at our house and I was getting ready for a late afternoon snooze when the baker in me dragged me up and admonished me about wasting away a full day. I gave in and decided to bake something quick. Scones have been at the back of my mind for some time now. Today was the perfect occasion. I had a sliver of pumpkin left over from making Pumpkin Erissery. I had wanted to use it for baking and it provided me with an opportunity to make a savoury bake. I adapted the recipe from here adjusting it to suit our palate.


Its a great recipe and my scones turned out perfect. I cannot even begin to explain the sheer pleasure one derives upon a successful first-time bake!
The scones were a big hit with everyone going for seconds and the hubby even grabbing one right off my photograph!


Pumpkin Spiced Buttermilk Scones (Eggless)

Serrvings: 8 Scones
Prep Time: 30 mins Cook Time: 20 mins

Ingredients

2 cups All purpose Flour + 1/4 cup as required while kneading the dough
1/3 cup white granulated sugar
1/2 tsp Baking Soda
1 tsp Baking Powder
1/2 tsp Cinammon powder
1/2 tsp Ginger (dry powder or fresh grated)
3/4 tsp Salt
1/2 cup Unsalted Butter (cold cubes)
1/3 cup Buttermilk
1/2 cup Pumpkin Puree (fresh or canned)
1 tsp Vanilla essence

Instructions

  1. Preheat oven to 400 deg F and line a baking tray with parchment paper
  2. Whisk together the flour, salt, sugar, baking soda, baking powder, cinammon and ginger and set aside
  3. Cut the cold butter into the flour using a knife and fork or two knives till a crumbly mixture is formed. It is alright to have a few big chunks of butter in the mixture.
  4. If its
  5. In another bowl whisk together the pumpkin puree, buttermilk and vanilla essence.
  6. Add the wet ingredients to the dry ingredients and mix until the dough just comes together. Do not overmix as this can cause the scones to lose their airy composition
  7. Transfer to a lightly floured surface and knead lightly to form a lump. At this point sprinkle some flour on the dough to get it all together if required
  8. Pat the dough into a circle of roughly 6-7 inches and about 1 1/2 inches thick
  9. Cut this circle into 8 even sized pie shaped wedges using a knife (floured)
  10. Carefully lift each wedge and place it on the baking sheet.
  11. Lightly dab the butter wrapper on top of each scone to get a golden color once baked
  12. I used a rectangular cake tin inverted as the "baking sheet" and hence did not fear the scones getting burnt at the bottom. But Stephanie does suggest placing the thin baking sheet inside another one to prevent burning.
  13. Bake for about 20 mins till the scones are golden brown and a skewer inserted comes out clean.
  14. Allow it to cool on the baking sheet for 5 minutes before transferring to a wire rack to cool completely. Enjoy it warm with your favourite cup of coffee, tea or milk!

How to Puree Pumpkin

Wash and peel the tough skin off the pumpkin
Cut into even sized pieces
Boil in water for around 15-20 mins till soft
Let cool, drain the water and puree in a blender

How to make Buttermilk

Add 1 tbsp vinegar to 1 cup of Milk and let sit for 10 minutes.
The milk curdles to form buttermilk.


Related Posts Plugin for WordPress, Blogger...